Showing posts with label 4ground. Show all posts

Thursday, 31 August 2017

Liberdy - rules for the Wild West (and other places)

Way down in Liberty,somewhere on the border between Canada and Mexico, we've been a'tinkering with our in-house Wild West rules and having ourselves a few test games.
Each player controls a gang of 4 gunmen - usually 3 pistoleros and a rifleman
Virtually everything in the game is handled by two decks of cards, ideally with different backs

  • Spades: shooting and hand-to-hand
  • Clubs: movement - the number is the distance in inches they can move
  • Hearts: saving against shooting and hand-to-hand
  • Diamonds: both shooting and hand-to-hand AND saving
  • Jokers: saving AND fan-shooting pistols AND initiative

Certain cards have other uses
Cards are ranked from high to low as follows

  • Joker, Ace (worth 11), King, Queen Jack, 10 down to 2
  • Hearts, Clubs, Diamonds, Spaces
  • Blue back, Red back


The turn sequence is

  • Each player is dealt a hand of 5 cards.
  • Each player selects one of their cards for initiative and places it face down
  • All initiative cards a re revealed and the order of play worked out using the Card Rank
  • In initiative order each player uses his cards for moving, shooting etc
  • Cards for shooting and saving can be held back in  case you are shot at etc
  • A player's turn can be interrupted by other players shooting on over-watch.
  • If any civilians are nearby they may react to firing 
  • Once everyone has had a go then all cards are returned  and a new turn starts


Shooting and Hand-to-Hand

  • Pistols have a 12" range and rifles have an 18" range
  • To shoot a player indicates the shooting figure and the target figure and plays a Spade or Diamond
  • The target player must play a Heart, if they have one, or a Diamond if they want to
  • There are various modifiers for cover, height, over-watch etc
  • If the shooter's card is higher than the target or the target does not play a save card then the target is hit
  • If the target is hit the shooter then rolls a D6 and scores that amount of damage on the target
  • Every figure can take upto 5 hits before being killed


Those nice people who actually live in Liberty

Townsfolk can be affected by gang members shooting. Any non-gang member within 6" of someone shooting draws a card. Depending on whether they are armed or not they can run away, stand, move to the action or start shooting

There are a few extra rules but that's about it. If something isn't covered by a rule then we wing it.

Here's some recent activity in Liberty which has a habit of changing every time there's a show-down


Sometimes it looks like this ....
...and other times it looks like this
It's got the regular 3:15 from Yuma
Entertainment...
... to suit...
...everyone
And attracts many
,many
,many
,way too many visitors

Where's the sheriff when you need him? Dead?

He'll do. Oh he's the pianist
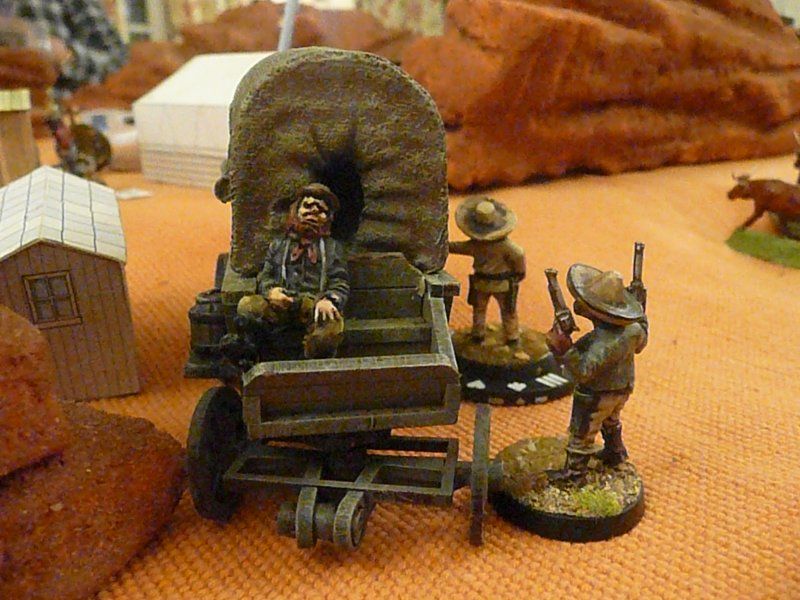
The ideal candidate.

The buildings are either by 4Ground or Whitewash City and lovingly cared for by Shaun who also owns the train

The figures are by various manufacturers

The original rules were picked up at a participation game - can't remember the club but thank you. 

Our version can be found on the Liberdy rules page.


Saturday, 30 May 2015

FWC Bootcamp 2015 - Saturday

The sixth FWC Bootcamp, the world's premier (only) organised gaming weekend for 6mm Future War Commander, took place on 30th & 31st May 2015 at the Tudor Arms, Slimbridge, Gloucestershire.
Saturday's contingent included Gordon, Luke, Mark, Mike, Paul, Rodge & Steve. As tradition demands we started off with a 1000 point Mad Max game based around the Ork/Hunter-Scavenger army list. As tradition demands most people ignored this and used other armies.
We split into 2 teams - Red with Pax Acardians, Eldar and 2 Ork armies facing Black with Space Marine 2 Sisters of Battle and an Ork force
There were two objectives - kill the enemy, obviously , and get data, booty and various other tat from the Ork dropship sitting in the middle of the table. This was represented by having a command unit adjacent to the dropship during the initiative phase which earned the force 1 Victory Point
As usual the battle descended into chaos. Black Space Marines overrunning several Red Ork Command units and pushing them off the table - twice!.Red Eldar refusing to do anything although when they did get going they stomped the Black Space Marines, Black Sisters of Black relentlessly attacking the rear of another mob of Red Orcs. Pax Arcs sitting on a hill lobbing smart missiles at all and sundry and the commander of the Black Space Marine ending up in an acid lake!
Pax Arcadians on the move
The Space Marines Commander finds a case of steroids on the Ork dropship
Red Team Orks occupy the landing pad
Black Team Nazi Orks pass through the ..er.. pass
Sisters of Battle attack Orks in the rear
Black Space Marine Commands ends up in the acid lake
Nazi Orks pile into town
Pax Arc SOP - deploy and fire smart missiles
Eldar toast the Space Marines
Red Team Victorious

Honours eventually went to the Red team with 5 VP to Black's 2 VP

In the afternoon Paul umpired a scenario that looked impressive and kept Steve, Gordon and Luke engaged for several hours. I noticed a Star gate, coastline, a rail network and a bordello among the scenery plus individual player instructions. It's on my list to play.  I've no idea who won - I'll ask tomorrow.
Paul's board 
A Star Gate, bordello and Girl Guide Camp?
The train approaching platforms 3,4 and 5 is coming in sideways
Pax Arcs allow an RDF convoy to pass

I roped Mark into trying out my Dudley Zoo scenario which is based on a throw-away paragraph in a Bolo Story.

Mark's objective was to control all of the floors of  the zoo's Gene Bank.

Simple - just get past the wild fauna roaming around, the half-crazed survivors pouring up from the animal pens and the three-quarter-crazed zoo staff holding the building itself.

Dudley Zoo with animal pens, gene bank and giant pint of lager
I used 4Ground's impressive District 1 Bank ,which they had kindly donated, as the Dudley Zoo Gene Bank. although it is designed for 10mm it does work really well with 6mm. 

Neo-Soviets advance towards the Gene Bank
Half-crazed survivors have a good laugh as the Sovs Forward Artillery Observer blunders
Aftermath of the Artillery Blunder - CO suppressed
More survivors appear from the animal pens
I really should pose my photos better
Neo-Sovs at the doors of the Gene Bank
Ground floor Staff Security welcome the Sovs
We need more troop!

Mark had no idea what to expect so used his Neo-Soviet force (1500 points) which slowly shot it's way through the grounds of the zoo to the building only to have his infantry halted on the ground floor of the gene bank.

Originally I was going to do this as a multiplayer game but with hindsight it's either a one force game or solo game. Capturing the building requires either solid, tough infantry such as Space Marines or masses of foot eg Orks

Tomorrow is a replay of the A Star Gate Too Far scenario - can't wait

More photos here

Thursday, 19 February 2015

Skirmish on the L'Adour - 15mm Napoleonic Muskets and Tomahawks

General Situation
By 1814 an allied army of British, Portuguese and Spanish troops was operating in southwestern France. The French army under Marshal Soult had retired east from Bayonne towards Orthez. followed by an Anglo-Portuguese Army under Field Marshal Arthur Wellesley, Marquess of Wellington leaving Bayonne under siege. The siege was described as "leisurely to the point of apathy" with French and British soldiers fraternizing and exchanging goods and letters
View from the south east corner - Shaun is in the river
The Scenario
This scenario is set in a small hamlet somewhere along the south bank of the River Adour between Bayonne and Orthez.
View from the south west corner
The hamlet of 4 houses is set hard against the river, just off table to the north. There is a road running east-west through the hamlet with a road running off to the south. The area to the south of the hamlet rises up through wood hills to a ridge.
The French
A supply column escorted by an infantry battalion and an artillery piece has left Bayonne aiming to join up with Soult's army. The objective is to get the 2 supply wagons off the eastern edge of the table
6 Officers Veteran, Scout
3 Fusilier Companies Average, Musket, Firing Line (8 bases each)
1 Fusilier Company Green, Musket, Firing Line (8 bases)
1 Grenadier Company Veteran, Musket, Firing Line, Scout (8 bases)
1 Voltigeur Company Veteran, Musket, Firing Line, Scout (8 bases)
1 Gun
2 Wagons
The French can deploy 3 companies in the hamlet, the remainder of the force enter on the western road on turn 1. The order of march must be set out beforehand as arrival will be at the mercy of the Activation cards
The British
A large reconnaissance force of 4 Companies, Kings German Legion has been tasked with capturing the supply column and locating and escorting 2 British spies back to friendly lines.
3 KGL Officers Veteran, Scout
2 Light Companies KGL Veteran, Rifle, Scout (8 bases)
2 Line Companies KGL Average, Musket, Firing Line (8 bases)
The British can deploy anywhere along the southern edge of the table

The Game
The French deployed 3 companies  in the buildings at eastern end of the hamlet. The column was set out  with 2 wagons, the gun and the remaining 3 companies.
The British deployed all of their troops in the southeastern area of the ridge and moved rapidly to form a loose north-south line across the eastern edge of the table. The riflemen then proceeded to shoot the French troops in the hamlet.
At the other end of the table the column became a traffic jam as the wagons blocked everything else from coming onto the table. Eventually the jam was sorted out and the 3 extra companies started forming a line to advance against the British
The British realised that if the French advanced them then they would be overwhelmed so they moved a rifle company back up onto the ridge to enfilade any approaching French. They caused severe casualties to the French as a result of this.
Back at the eastern end of the hamlet the rifles played havoc with the French troops picking them off slowly but surely. The French mistakenly decided to return fire rather than charge out and engage the British in close combat.
Inevitably the riflemen wore down their opponents who belated decided to charge out forcing the KGL Line companies to retire with losses
The artillery piece did not get into action and was over run by a rifle company swarming through the buildings searching for the spies. With barely a full company left the French quit the field leaving both wagons, the gun and the 2 spies to the British.
The End
An interesting game between a shooty force and a stompy force with the later playing into the hands of the former by going for the fire-fight rather than closing with the bayonet. The rifles were lethal in this game even though they take twice as long to reload. The artillery was almost useless so I might have a tweak with the rules for them. Otherwise I'm very pleased with this variant of Muskets and Tomahawks.
The Toys
The buildings are from 4Ground's La Haye Sainte range and work fine as standalone buildings
The figures are by Campaign Game Miniatures
The Muskets and Tomahawks variant can be found here