José Curbelo
Rumour has it that he currently resides in a tiny hamlet called Boanas that lies in a seldom used pass from the coastal plains up to the Mexican plateau.
The French column on route to Boanas, auxiliaries at the head followed by Captain Rocher and the mounted Zouaves
The French forces
The French authorities have dispatched 2 platoons of mounted Zouaves and a handful of auxiliaries under the command of Captain Ferrero Rocher to Boanas to capture Curbelo.
Captain Ferrero Rocher
1st squad, Mounted Zouave company 3 Bases Skirmish,Aggressive Veteran MLR
2nd squad, Mounted Zouave company 3 Bases Skirmish,Aggressive Veteran MLR
Auxiliaries 3 Bases Aggressive Trained MLR
Rocher can act as a normal commander or attach himself to a unit as an extra base
The French are controlled by the player
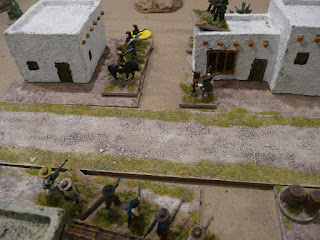
Curbelo takes Sunday morning drill.
In the background a nun leaves the village with her two donkeys after making another arms delivery.
The Mexican Forces
These are the locals from Boanas organised by Curbelo into a militia. When a French unit searches a building there is a chance that between 0 and 4 units will appear in the building. This is determined by using a pack of cards and dealing out 4 cards for each search. On a 2 to 9 of Clubs a militia squad appears in the building, on the Ace of Clubs then Curbelo and a militia squad appear in the building. Every other card is ignored.
José Curbelo
Upto 10 squads of Militia 3 Bases Fragile Raw MLR
Curbelo can act as a normal commander or attach himself to a unit as an extra base
The Mexican squads use a D6 to see whether they assault (6), stay put and shoot (2-5) or retire to the next building (1)
The Game
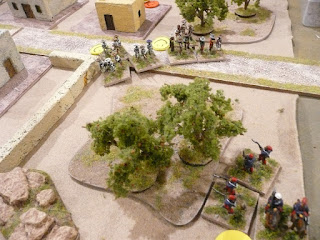
The French deployed Captain Rocher with 1st squad Zouaves and the Auxiliaries at the east end of the village with 2nd squad sneaking through to the west end under cover of night.
The Auxiliaries search the first building and find nothing
1st Squad encounters a Militia squad and gets a base killed!
The Auxiliaries move up to give them fire support
1st Squad storms the building
The Auxiliaries move down the street
They encounter another Militia squad
And a to and fro encounter for control on the building ensues...
... that sees the building ...
... change hands several times
In the meantime 1st Squad have cleared another building and advance on the church
The Church holds another Militia squad who repulse Captain Rocher and 1st Squad
At the west end of the village 2nd Squad advance to support the attack on the church.
However 3 Militia squads are waiting for them!
All 3 Militia squads assault 2nd Squad who halt one with fire but ...
... get a good kicking from the others,lose a base, and fall back on their horse line
The victorious Militia follow up
2nd Squad advances again and half the Militia retire Spent
They rolled Double 1 on the Disrupted table and being Fragile dropped them to 1
2nd squad advance back into the buildings with only spent Militia in front of them
The Militia unit in the church fall back to the last remaining building where José Curbelo and 2 Militia squads are determined to make their stand
Curbelo takes a last look around Boanas
Although the French are outnumbered they feel confident of storming the building and taking Curbelo prisoner
However 2 Militia squads take it into their heads to assault the Auxiliaries
The Auxiliaries fall back before the onslaught
Seizing the opportunity Captain Rocher assaults Curbelo's squad who flee taking Curbelo with them
Forgetting his objective Captain Rocher charges to support the Auxiliaries destroying first one squad
and then the other squad leaving the village in his hands
But giving José Curbelo and a few followers time to flee down the pass
"Mount up" - a frustrated Captain Rocher head out on the trail of José Curbelo
I'm not sure if I saw that ending coming but there is the distinct possibility of a sequel.
In a previous test game the Captain and a single squad ended up surrounded and making a last stand
It is quite a random game. With 7 buildings and a 4 card deal per building there is a chance that no one at all is in the village or as in the case of 2nd squad they run into 3 or 4 times their own number in one building.
I thought that Bloody Big Battles handled this instance very nicely with 2nd Squad retiring, some of the Mexicans madly charging after them, exploitation, and then deciding it was a bad idea, failed Movement rolls, when 2nd squad came back for more.
The Mexican squads use a D6 to see whether they assault (6), stay put and shoot (2-5) or retire to the next building (1) which gives some surprising results such as 2 of Curbelo's squads deciding not to do a last stand and charging out instead.
An excellent solo Christmas game if I say myself - my opponent was a pleasure to play with
99% of the figures are Freikorps with a smattering of Peter Pig figures
The buildings are by Musket Miniatures
Finally thanks to Shaun for finishing off my Mounted, and dismounted, Zouave company that have been sitting half-painted o my work bench for nearly 2 years.


