Tuesday, 15 January 2019

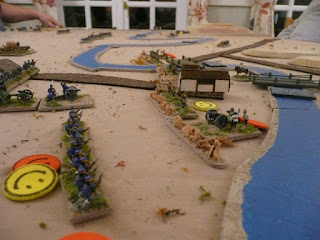
Te-li-Ssu 1904 RJW using Blood Big Battles

The battle of Te-li-Ssu was fought on 14–15 June 1904 during the Russo-Japanese War. This scenario was originally written for the Age of Valor ruleset and I've converted it, very roughly, for Bloody Big Battles.
Japanese 3rd Division assaults the Russian left flank

The main changes from the original scenario are
  • reduced size of table from 8x5 feet to 6x4 feet
  • reducing the number of infantry and cavalry bases by about 50%
  • reducing the Japanese artillery by 75%
  • reduce the number of turns from 15 to 12
The reasons being the available table, stands of troops and time.

Looking west across the battlefield

The streams are fordable by infantry and cavalry and the hills are steep. The ground level is difficult going for movement as it is cut down kaoliang.

Japanese Forces

Bases Type Traits Morale Weapon
3d Div 1 Ldr
6th Regt 4 Inf S,A Trn RR
35th Regt 4 Inf S,A Trn RR
18th Regt 4 Inf S,A Trn RR
24th Regt 4 Inf S,A Trn RR
Div Art 2 Art Trn BLA
4th Div 1 Ldr
8th Regt 4 Inf S,A Trn RR
37th Regt 4 Inf S,A Trn RR
9th Regt 4 Inf S,A Trn RR
38th Regt 4 Inf S,A Trn RR
Div Art 2 Art Trn BLA
5th Div 1 Ldr
11th Regt 4 Inf S,A Trn RR
41st Regt 4 Inf S,A Trn RR
21st Regt 4 Inf S,A Trn RR
42nd Regt 4 Inf S,A Trn RR
Div Art 2 Art Trn BLA
1st Cavalry
Regular 4 Cav Raw RR
Divisional 4 Cav Raw RR
Army Art 3 Art Trn BLA

Russian Forces

Bases Type Traits Morale Weapon
1st Div
1st ESRR 5 Inf Raw RR
2d ESRR 5 Inf Raw RR
3d ESRR 5 Inf Raw RR
4th ESRR 5 Inf Raw RR
Div Art 2 Art Trnd BLA
9th Div
33d ESRR 5 Inf Raw RR
34th ESRR 5 Inf Raw RR
35th ESRR 5 Inf Raw RR
36th ESRR 5 Inf Raw RR
div Art 2 Art Trnd BLA
35th Div
Tobolsk 5 Inf Trnd RR
Marshansk 5 Inf Trnd RR
Zaraisk 5 Inf Trnd RR
Div Art 2 Art Trnd BLA
Cavalry
Cossacks #1 3 Cav S Raw RR
Cossacks #2 3 Cav S Raw RR
Samsonov #1 3 Cav S Trnd RR
Samsonov #2 3 Cav S Trnd RR
Art 1 Art Trnd BLA

The Japanese plan of attack was for the 4th & 5th Divisions to roll up the Russian right flank whilst 3rd Division demonstrates against the Russian left flank.

(A word on the Smiley faces - Yellow is Disrupted, Green is Low on ammo and Red is Spent)

The "Unlucky" 4th Division advances towards the entrenched Russian Cavalry
 The initial assault is halted with both sides taking casualties
The Japanese 5th Division assaults the junction of the Russian cavalry and the 9th ESRD
5th Division storms the trenches ...
..reforms on the hill... 
... and stands it's ground whilst attacked from front and rear
 Meanwhile the Russians quickly form a new defensive line on their flank from the remaining cavalry, part of the 35th Division and 2 batteries.
 As Japanese 5th Division is hammered by the Russian line, the 4th Division reforms and joins the attack
4th Division takes over the attack from 5th Division,which presses on for Telissu, but fails to capture the the Russian guns
 A new Russian defensive line halts 4th Division's attack 
 5th Division's advance on Telissu is halted by another Russian gun line covering the approach to Telissu and it disintegrates.
The Russian right flank at the end of the game - a standoff
Meanwhile on the Russian left flank, the Japanese 3rd Division is busily demonstrating away
 Until it gets fed up with demonstrating and decides to have a go
 As it advances against the 1st ESR Division it is supported by it's artillery 
 The entire left flank of the Russian line collapses under the onslaught
and on the penultimate turn it storms Telissu

So a victory for the Japanese at the last possible moment and from an unexpected direction. 

Admittedly most of the Russian force had disappeared as it was Raw and it was only the 35th Division plus artillery that was hanging on. The entire Japanese 5th Division was out of action but the 4th had recovered it's strength due to high-rolls on the Movement table.

A very good scenario which I hope did justice to the original. The original scenario is available on ScribD but they wanted me to enter my card details so I could download it. Fortunately I found an old copy in my backups

As usual I do have one complaint. This is a common wargaming one - the table-edge of the world. I've noticed it especially in the RJW battles where the Sedan-fixated Japanese generals are always attempting to outflank the Russians. I will have to have a think about how to handle this.

Thanks to Dave, Mike, Rodge and Shaun for playing 

The figures were all from Pendraken's 10mm ranges


Thursday, 27 December 2018

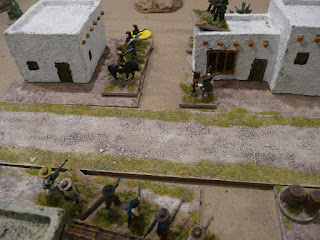
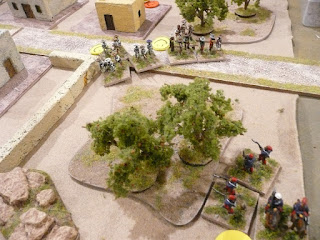
The Deserter, Mexico 1864 - a 15mm solo game using Bloody Big Battles

My Christmas solo game this year is set during the French Intervention in Mexico and concerns the arrest of a deserter from the French Foreign Legion who has "gone native".
José Curbelo

The deserter is a Spaniard called José Curbelo who has fought for the Legion in Algeria, the Crimea where he lost an eye at Sevastopol, Italy and, until recently, Mexico.

Rumour has it that he currently resides in a tiny hamlet called Boanas that lies in a seldom used pass from the coastal plains up to the Mexican plateau.

The French column on route to Boanas, auxiliaries at the head followed by Captain Rocher and the mounted Zouaves

The French forces

The French authorities have dispatched 2 platoons of mounted Zouaves and a handful of auxiliaries under the command of Captain Ferrero Rocher to Boanas to capture Curbelo.

Captain Ferrero Rocher
1st squad, Mounted Zouave company 3 Bases Skirmish,Aggressive Veteran MLR
2nd squad, Mounted Zouave company 3 Bases Skirmish,Aggressive Veteran MLR
Auxiliaries 3 Bases Aggressive Trained MLR

Rocher can act as a normal commander or attach himself to a unit as an extra base

The French are controlled by the player

Curbelo takes Sunday morning drill. 
In the background a nun leaves the village with her two donkeys after making another arms delivery.

The Mexican Forces

These are the locals from Boanas organised by Curbelo into a militia. When a French unit searches a building there is a chance that between 0 and 4 units will appear in the building. This is determined by using a pack of cards and dealing out 4 cards for each search. On a 2 to 9 of Clubs a militia squad appears in the building, on the Ace of Clubs then Curbelo and a militia squad appear in the building. Every other card is ignored.

José Curbelo
Upto 10 squads of Militia 3 Bases Fragile Raw MLR

Curbelo can act as a normal commander or attach himself to a unit as an extra base

The Mexican squads use a D6 to see whether  they assault (6), stay put and shoot (2-5) or retire to the next building (1)

The Game

The French deployed Captain Rocher with 1st squad Zouaves and the Auxiliaries at the east end of the village with 2nd squad sneaking through to the west end under cover of night.

 The Auxiliaries search the first building and find nothing
1st Squad encounters a Militia squad and gets a base killed!
The Auxiliaries move up to give them fire support
1st Squad storms the building
The Auxiliaries move down the street 
 They encounter another Militia squad 
 And a to and fro encounter for control on the building ensues... 
... that sees the building ...
... change hands several times
In the meantime 1st Squad have cleared another building and advance on the church 
 The Church holds another Militia squad who repulse Captain Rocher and 1st Squad
At the west end of the village 2nd Squad advance to support the attack on the church. 
However 3 Militia squads are waiting for them!
All 3 Militia squads assault 2nd Squad who halt one with fire but ...
 ... get a good kicking from the others,lose a base, and fall back on their horse line
 The victorious Militia follow up 
2nd Squad advances again and half the Militia retire Spent
They rolled Double 1 on the Disrupted table and being Fragile dropped them to 1
2nd squad advance back into the buildings with only spent Militia in front of them 
The Militia unit in the church fall back to the last remaining building where José Curbelo and 2 Militia squads are determined to make their stand 
Curbelo takes a last look around Boanas
Although the French are outnumbered they feel confident of storming the building and taking Curbelo prisoner
 However 2 Militia squads take it into their heads to assault the Auxiliaries
 The Auxiliaries fall back before the onslaught
Seizing the opportunity Captain Rocher assaults Curbelo's squad who flee taking Curbelo with them
 Forgetting his objective Captain Rocher charges to support the Auxiliaries destroying first one squad
 and then the other squad leaving the village in his hands
 But giving José Curbelo and a few followers time to flee down the pass 
"Mount up" - a frustrated Captain Rocher  head out on the trail of José Curbelo

I'm not sure if I saw that ending coming but there is the distinct possibility of a sequel.

In a previous test game the Captain and a single squad ended up surrounded and making a last stand

It is quite a random game. With 7 buildings and a 4 card deal per building there is a chance that no one at all is in the village or as in the case of 2nd squad they run into 3 or 4 times their own number in one building.

I thought that Bloody Big Battles handled this instance very nicely with 2nd Squad retiring, some of the Mexicans madly charging after them, exploitation, and then deciding it was a bad idea, failed Movement rolls, when 2nd squad came back for more.

The Mexican squads use a D6 to see whether  they assault (6), stay put and shoot (2-5) or retire to the next building (1) which gives some surprising results such as 2 of Curbelo's squads deciding not to do a last stand and charging out instead.

An excellent solo Christmas game if I say myself - my opponent was a pleasure to play with

99% of the figures are Freikorps with a smattering of Peter Pig figures
The buildings are by Musket Miniatures

Finally thanks to Shaun for finishing off my Mounted, and dismounted, Zouave company that have been sitting half-painted o my work bench for nearly 2 years.


Friday, 16 November 2018

Ko-lin-zo 1905 RJW using Blood Big Battles

This is an AAR of the Boer War Colenso scenario for Bloody Big Battles. I don't have any Boers or British so I used my 10mm Russo-Japanese War forces and disguised the scenario.
Russian Dragoons and artillery dug in on Hlangwane overlooking Colenso

The Japanese were the British and the Russians were the Boers. I changed the background from the British attempting to relieve Ladysmith to a Russian raiding cavalry force being caught by the Japanese. Otherwise the scenario was left unaltered.

 The battlefield looking west. Colenso is the village on the road
 The battlefield looking east
Japanese 2nd Brigade advances on Colenso
Russian forces hold Hlangwane Mountain
Dismounted Russian cavalry entrenched around Colenso
Japanese cavalry advancing on Robinson’s Drift defended by Russian Cossacks
The Japanese 2nd Brigade starts taking fire from Colenso
Japanese 5th Brigade advances on Punt Drift
The right wing of Japanese 2nd Brigade gets a hammering and becomes spent
Japanese "Naval" guns drawn by oxen plod up the road to Colenso
Russian Cossacks defend  Punt Drift
At Robinson’s Drift the Cossacks gun down the Japanese cavalry
Left wing of Japanese 2nd Brigade charges the Russian line at Colenso
The remainder of 2nd Brigade and loads of artillery make life difficult for the Russian defenders
Japanese 7th Brigade takes up a firing line west of Colenso
Japanese 6th Brigade, and the remains of 5th Brigade, advance on  Bridle Drift.
The firefight continues at Colenso
The west flank of Colenso collapses 
Russian artillery pins down 7th Brigade
More Japanese troops are thrown against Robinson's Drift.
The Russian troops lose the firefight at Bridle Drift.
The Russian line breaks as the Japanese capture Mt.Wylie and the remaining objectives

Games never quite play out how you imagine them to. I was expecting a rerun of the historical battle where the Boers hammered the British. Instead after only 4 of the 8 game turns the British were across the river and capturing objectives.

Having not told the players that we were fighting Colenso but having explained the scenario rules there were groans from both sides.

The Japanese players (Mike & Shaun) were griping about the difficulty of seeing and shooting the Russians. Troops in rifle and gun pits are only seen at 6" and the Russians get Shooting left shifts for being skirmishers, in rifle pits and camouflage i.e. 3 Left shifts

The Russian players (Rodge & Steve) gripped about the hordes of Japanese troops facing them, 3:1 in favour of the Japanese, the vast area they had to cover, 8 feet with 15 bases, and the troops stuck on Hlangwane

I found it all quite amusing.

But why did the Russians do so badly in this game?

It was all down to their deployment. They deployed too far forward especially at Colenso. As the river is impassable except at bridges and fords the best deployment areas are within 6" of the crossing point exits as the Japanese only have 6" visibility. Therefore in order to engage the Russians they have to cross the river one unit at a time in line. However this would give the Russians one shooting shift right and probably force them back across the river..

Still we all make mistakes

Thanks to Anton van Dellen for a very well thought out scenario. Gripes aside the players all want to play it again. Anton has done a few more Boer war scenarios that I'm eyeing up.

The figures are all from Pendraken's 10mm Russo-Japanese War range with the exception of the Japanese cavalry who are proxies from the South American Wars range