Saturday 24 October 2015

28mm Bugs v Marines

Stuart had the pleasure of putting on his first game at the Berkeley Vale club on Monday and it was a good one - 28mm Marines vs Bugs. Bugs Mr Rico - quite a lot of them!


The scenario
It had all gone very quiet at the mining colony so 4 squads of 5 Marines were sent to investigate the camp and hold until relieved - ideally in the fort

Dave and Shaun played the Marines whilst Rodge and I played the Bugs


The Marines entered on one table edge and proceeded to make their way to the fort in the middle  of the table.

The Bugs arrived randomly each turn by
  • rolling an Average dice to see how many groups appeared
  • rolling an Average dice per group to see how many bugs there were
  • rolling a D8 to see where each group appeared

By turn 3 all available bugs - 75 of them - were on the table coming from all directions. Rodge, the super bug brain, sent a load to occupy the fort before the Marines got there.


It's not nice having a horde of bugs to one's rear and it slowed the Marines as they attempted to gain the security of the fort.

The bugs could take 3 wounds as opposed to the Marines' 2 wounds so it was imperative to shoot the bugs before they got into contact.

With the fort infested the Marines would have a fight on their hands occupying it.

With more and more bugs getting into the fort a bitter fight ensued at the gates

The majority of the Marines form a "square" to allow their comrades to fight for the gates

All modesty aside my arrivals dice rolls were great especially when the Hoppers appeared
The Marine firepower couldn't hold back the bugs

A Hoppper's eye view of the fort

Too many wounded Marines and too many bugs can only mean...

...Game Over

A super game that looked very good - it would have been very different if the Marines had been in the fort.

Technical details
The rules are Stuart's own rules which work very well
The Marines are Games Workshop Tau
Everything else - the bugs, the fort, the buildings and the vehicles - are paper


Sunday 4 October 2015

Laserstorm at Blast-tastic 2015

For various reasons only Steve and myself were available to put on a game at Blast-Tastic 2015. A couple of days beforehand we had both purchased Laserstorm (LS) so we decided to use the show as an opportunity to learn the rules.

We opted to do the Whiskey Outpost scenario that we've played before using FWC. This would give us a good idea of how the game played compared to FWC and is pretty simple as the bugs can only move and melee and the fort just has infantry that attempts to shoot up the horde.
Whiskey Outpost looking north, the fort is in the centre with 3 bug swarms piling out of their holes

Neither of us had given the rules more than a cursory glance so we had no idea what to expect. LS uses a card activation system - we had forgetten to bring any cards so Steve zoomed to Tesco and bought a set of Star Wars playing cards
Whiskey Outpost looking south,

We had a large table to fill so we scattered some "innocent bystanders" around the edge of the table
Some Angel Barrack's Worms
Thankfully Bugs haven't worked out how to use a StarGate
Some Second-hand Robot dealers
Planet of the Apes meets Dune

A Laserstorm army always contains 3 BattleGroups each of several units. Units comprise several stands all of the same type
The brave defenders

Steve's force was

Battlegroups 1 & 2

  • Unit 1: 1 Colonial Marine (Commander)
  • Unit 2: 3 Colonial Marines (Regular Infantry)
  • Unit 3: 1 Sniper (Infiltrator)

Battlegroup 3 - the same as BG 1 but without the Sniper
One of the Bug Battlegroups, no idea which as they all look the same to me with a Dragonfly CO

My force was

Battlegroups 1,2 & 3

  • Unit 1: 1 Bug (Commander) 
  • Units 2,3 & 4 : 6 Bugs with no shooting capability
The game is very simple - the bugs rush up to the walls with the defenders trying to shot as many of them as possible then everyone gets into hand to hand combat. Therefore it covers almost everything in the rules - movement, shooting, morale and close combat.

Another view of Whiskey Outpost with the snipers on the hills

Bugs head towards the landing pad
The Bug Coordination Centre controlling the battle
The landing pad is overrun and the bugs are at the walls
The defenders get whittled down and the bugs are on the rampart
An Infiltrator's view of the action
The last stand

The game took about 6 turns and 2 hours to play. Most of the 2 hours was spent reading through the rules as we learnt how to play. We got a couple of things wrong - not realising that commanders can shoot and adding the 5+ Cover save into the defender's save instead of doing them as separate save rolls.

In some respects we felt it was too easy for the bugs to win the combat at the wall. Combat is opposed dice rolls + the stand's assault modifier. The bugs had +5 Assault modifier whereas the Marines had 0 modifier. Therefore the bugs tended to win each combat forcing the Marines to make a standard saving roll of 5+ on 1D6 and if they failed that then another cover saving roll of 5+ on 1D6.  Maybe for fortifications we should drop the cover saving roll to 4+

In the afternoon we played the introductory scenario in the ruleset using Pax Arcadians vs Space Marines. This was a very swift affair as it became immediately apparent that cover is everything. Tanks, APCS and infantry die very very quickly if left out in the open.
Pax Arcadians head to the spaceship and stargate objectives
Space Marines hunker down
Game Over! The last 2 Pax Arc tanks about to get wiped out by overwhelming SM forces

As we had barely read the rules prior to playing we found Laserstorm very easy to pick up. I am happy to recommend these rules for fast big games. I'm also looking forward to putting all of my Pax Arcs on the table and playing with them.

The rules also come with instructions on how to create units and campaigns but I have yet to get my head round that aspect.

Finally to the show itself - Blast-Tastic is a cracking one day show concentrating solely on sci-fi gaming in all scales. If you are into sci-fi and can travel to Bristol then you should go.

Thursday 18 June 2015

Waterloo - a Russo-Japanese War refight

Waterloo ... 18th June 1815 ... 200th Anniversary .. etc etc ... if you need to know more then then look at wiki

For the past several months I've been playing my La Haye Sainte game at various shows in England. At the club this week I did think about playing it to commemorate the battle but honestly couldn't face it.
Japanese Kobi battalions attack Plancenoit

A few years ago I commemorated the D-Day battle of Pointe du Hoc by playing a game roughly based around it using troops from the French Intervention in Mexico in the 1860s. Therefore I decided to refight Waterloo with my 10mm Russo-Japanese Wars armies using Battles for Empire (BFE). So that's a Napoleonic battle fought with early 20th century troops using a set of Colonial rules

I commanded the Japanese who would play the part of the Anglo-Allied and Prussian armies and the Russians, commanded by Rodge, would be the French. I told Rodge that this was a refight of Waterloo and that the Japanese reinforcements would be coming in from the north because the table was flipped.

The Scenario
A Kobi battalion rests before the battle

During the battle of Mukden a Japanese attack to the north of the city has been held and the Russians are counter-attacking. The Japanese have fallen back on a ridge line but have had no time to prepare defenses before the Russians attack. The Japanese can expect reinforcements from the north but must hold the line otherwise the Russians will outflank the Japanese forces engaged to the south.
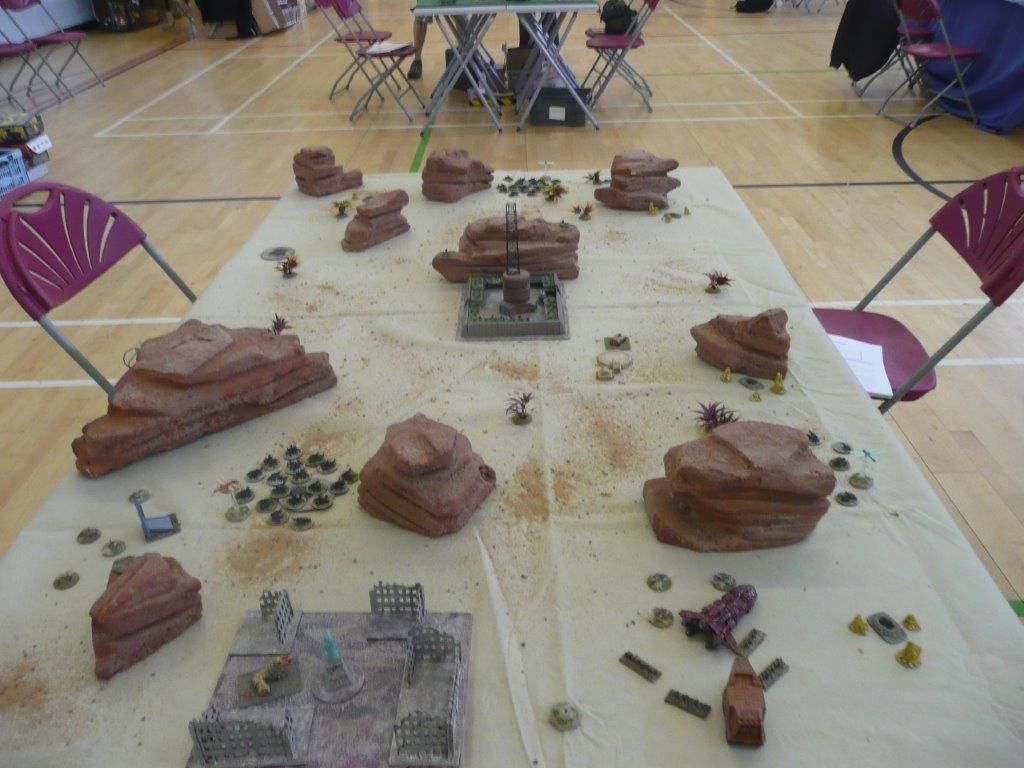
The Battlefield

I dumbed down the battlefield and flipped it so that Hougoumont was on the Japanese left flank and Plancenoit would be vaguely on their right flank. The were a few fields of kaoliang dotted around.

The Forces
The Japanese Commander waits for the Russians to advance

Japanese
6 Battalions of Line Infantry
3 Battalions of Kobi (Reserve) Infantry
4 Batteries of Artillery
2 Hotchkiss MG companies

These troops can  deploy anywhere east of the blue line

Reinforcements
3 Battalions of Line Infantry
6 Battalions of Kobi (Reserve) Infantry

Each turn roll 1D6 and note the score - 3 battalions appear when the score reaches 10, then a further 3 battalions at 20 and  the last 3 battalions at 30. Each reinforcement appears randomly along the north table edge.
The Russian commander watches his troops go over the ridge
Russians
16 Battalions of Line Infantry
4 Batteries of Artillery
4 Maxim MG companies
2 Sotnia Cossacks

All troops start on the western table edge

Deployment

The Japanese deployed as follows taking full advantage of the buildings and the reverse slope of the ridge
The Japanese Southern flank with Hougoumont in the distance

Southern flank
1 Line Battalion in Hougoumont
2 Artillery batteries and 1 MG Company on the ridge 
2 Line battalions behind the ridge 

Centre
1 Line Battalion in La Haye Sainte
1 Artillery battery and 1 MG Company on the Ridge 
2 Line battalions behind the ridge 
The Kobi battalions defend the Japanese Northern flank 

Northern flank
1 Kobi Battalion and 1 Artillery battery on the Ridge 
2 Kobi battalions behind the ridge 

The Russians deployed the artillery as a "grand battery" across the central road with 3 battalions to the south. The remainder of the force deployed north of the road. I thought that this was a cunning plan on Rodge's part as he would be coming face-to-face with the reinforcements. Rodge however had forgotten that and thought that the reinforcements were coming from the south.

The Battle

Artillery in BFE is devastating and when the Russian Grand battery opened up on the northern ridge line it qucikly destroyed the Kobi battalion and the artillery stationed there. This allowed the main Russian force to advance almost unopposed. 
The Russians advance on the northen ridge

The Japanese reinforcements arrive

However on turn 3 the the first lot of reinforcements, 3 Kobi battalions, appeared north of Plancenoit. The Russians dismounted the Cossacks in Plancenoit and together with an infantry battalion held off the Japanese.
Cossacks defend the approaches to Plancenoit

Japanese troops start moving north

To counter the Russian thrust against the northern flank the Japanese ordered all the troops behind the ridge to move north. 
The Russians advance ove rthe ridge
Japanese troops in La Haye Sainte about to attack the Russian flank
The two armies about to clash
The tail of the Russian assault force
The fight for the centre begins
With hindsight maybe the Japanese should have brought their firepower into play earlier. At close range both sides inflicted heavy casualties but with greater numbers the Russians gained the upper hand.

Japanese troops in Hougoumont pinned by skirmishing Russians

The southern flank was devoid of troops as the main Russian force fought to the north sucking in the Japanese troops. Hougoumont was held by a single battalion and pinned by two Russian battalions.
The Japanese commander stares defeat in the face

After the Japanese had lost the northern and centre ridge line I conceded the game. The original defenders had lost 6 of the 9 battalions plus both MG companies and 2 batteries. From the reinforcements only 6 of the 9 battalions had arrived and 3 of those would never reach the battle in time.

Therefore honours to the Russians but let's face it the French always win Waterloo. 

Maybe I should have risked putting the Japanese infantry on the ridge to shoot the Russians rather cower in the relative safety of the reverse slope. However the Russian artillery wrecked everything that showed itself.

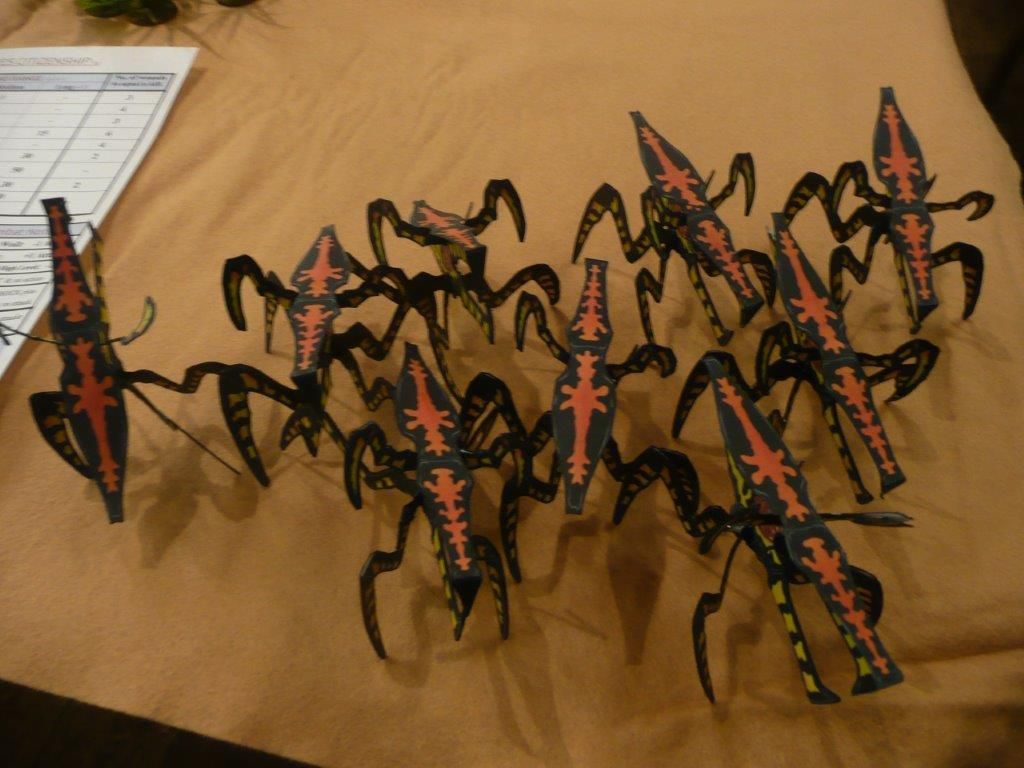
The figures are all by Pendraken