Friday 16 November 2018

Ko-lin-zo 1905 RJW using Blood Big Battles

This is an AAR of the Boer War Colenso scenario for Bloody Big Battles. I don't have any Boers or British so I used my 10mm Russo-Japanese War forces and disguised the scenario.
Russian Dragoons and artillery dug in on Hlangwane overlooking Colenso

The Japanese were the British and the Russians were the Boers. I changed the background from the British attempting to relieve Ladysmith to a Russian raiding cavalry force being caught by the Japanese. Otherwise the scenario was left unaltered.

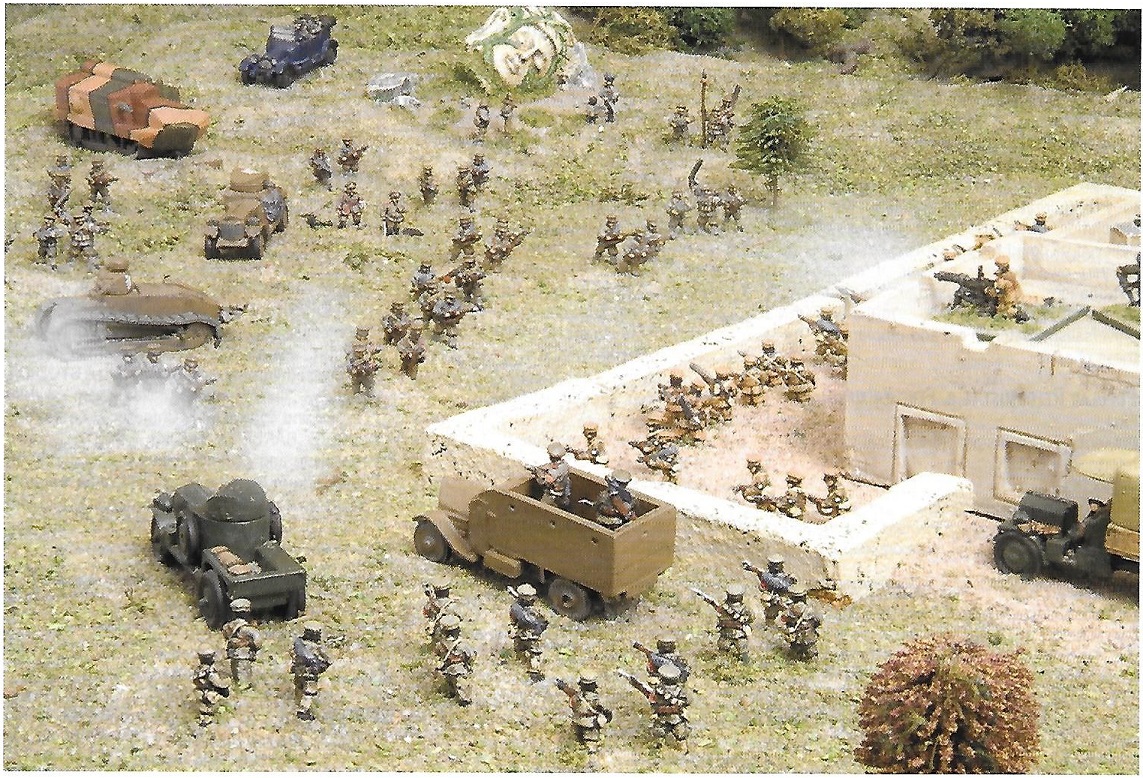
 The battlefield looking west. Colenso is the village on the road
 The battlefield looking east
Japanese 2nd Brigade advances on Colenso
Russian forces hold Hlangwane Mountain
Dismounted Russian cavalry entrenched around Colenso
Japanese cavalry advancing on Robinson’s Drift defended by Russian Cossacks
The Japanese 2nd Brigade starts taking fire from Colenso
Japanese 5th Brigade advances on Punt Drift
The right wing of Japanese 2nd Brigade gets a hammering and becomes spent
Japanese "Naval" guns drawn by oxen plod up the road to Colenso
Russian Cossacks defend  Punt Drift
At Robinson’s Drift the Cossacks gun down the Japanese cavalry
Left wing of Japanese 2nd Brigade charges the Russian line at Colenso
The remainder of 2nd Brigade and loads of artillery make life difficult for the Russian defenders
Japanese 7th Brigade takes up a firing line west of Colenso
Japanese 6th Brigade, and the remains of 5th Brigade, advance on  Bridle Drift.
The firefight continues at Colenso
The west flank of Colenso collapses 
Russian artillery pins down 7th Brigade
More Japanese troops are thrown against Robinson's Drift.
The Russian troops lose the firefight at Bridle Drift.
The Russian line breaks as the Japanese capture Mt.Wylie and the remaining objectives

Games never quite play out how you imagine them to. I was expecting a rerun of the historical battle where the Boers hammered the British. Instead after only 4 of the 8 game turns the British were across the river and capturing objectives.

Having not told the players that we were fighting Colenso but having explained the scenario rules there were groans from both sides.

The Japanese players (Mike & Shaun) were griping about the difficulty of seeing and shooting the Russians. Troops in rifle and gun pits are only seen at 6" and the Russians get Shooting left shifts for being skirmishers, in rifle pits and camouflage i.e. 3 Left shifts

The Russian players (Rodge & Steve) gripped about the hordes of Japanese troops facing them, 3:1 in favour of the Japanese, the vast area they had to cover, 8 feet with 15 bases, and the troops stuck on Hlangwane

I found it all quite amusing.

But why did the Russians do so badly in this game?

It was all down to their deployment. They deployed too far forward especially at Colenso. As the river is impassable except at bridges and fords the best deployment areas are within 6" of the crossing point exits as the Japanese only have 6" visibility. Therefore in order to engage the Russians they have to cross the river one unit at a time in line. However this would give the Russians one shooting shift right and probably force them back across the river..

Still we all make mistakes

Thanks to Anton van Dellen for a very well thought out scenario. Gripes aside the players all want to play it again. Anton has done a few more Boer war scenarios that I'm eyeing up.

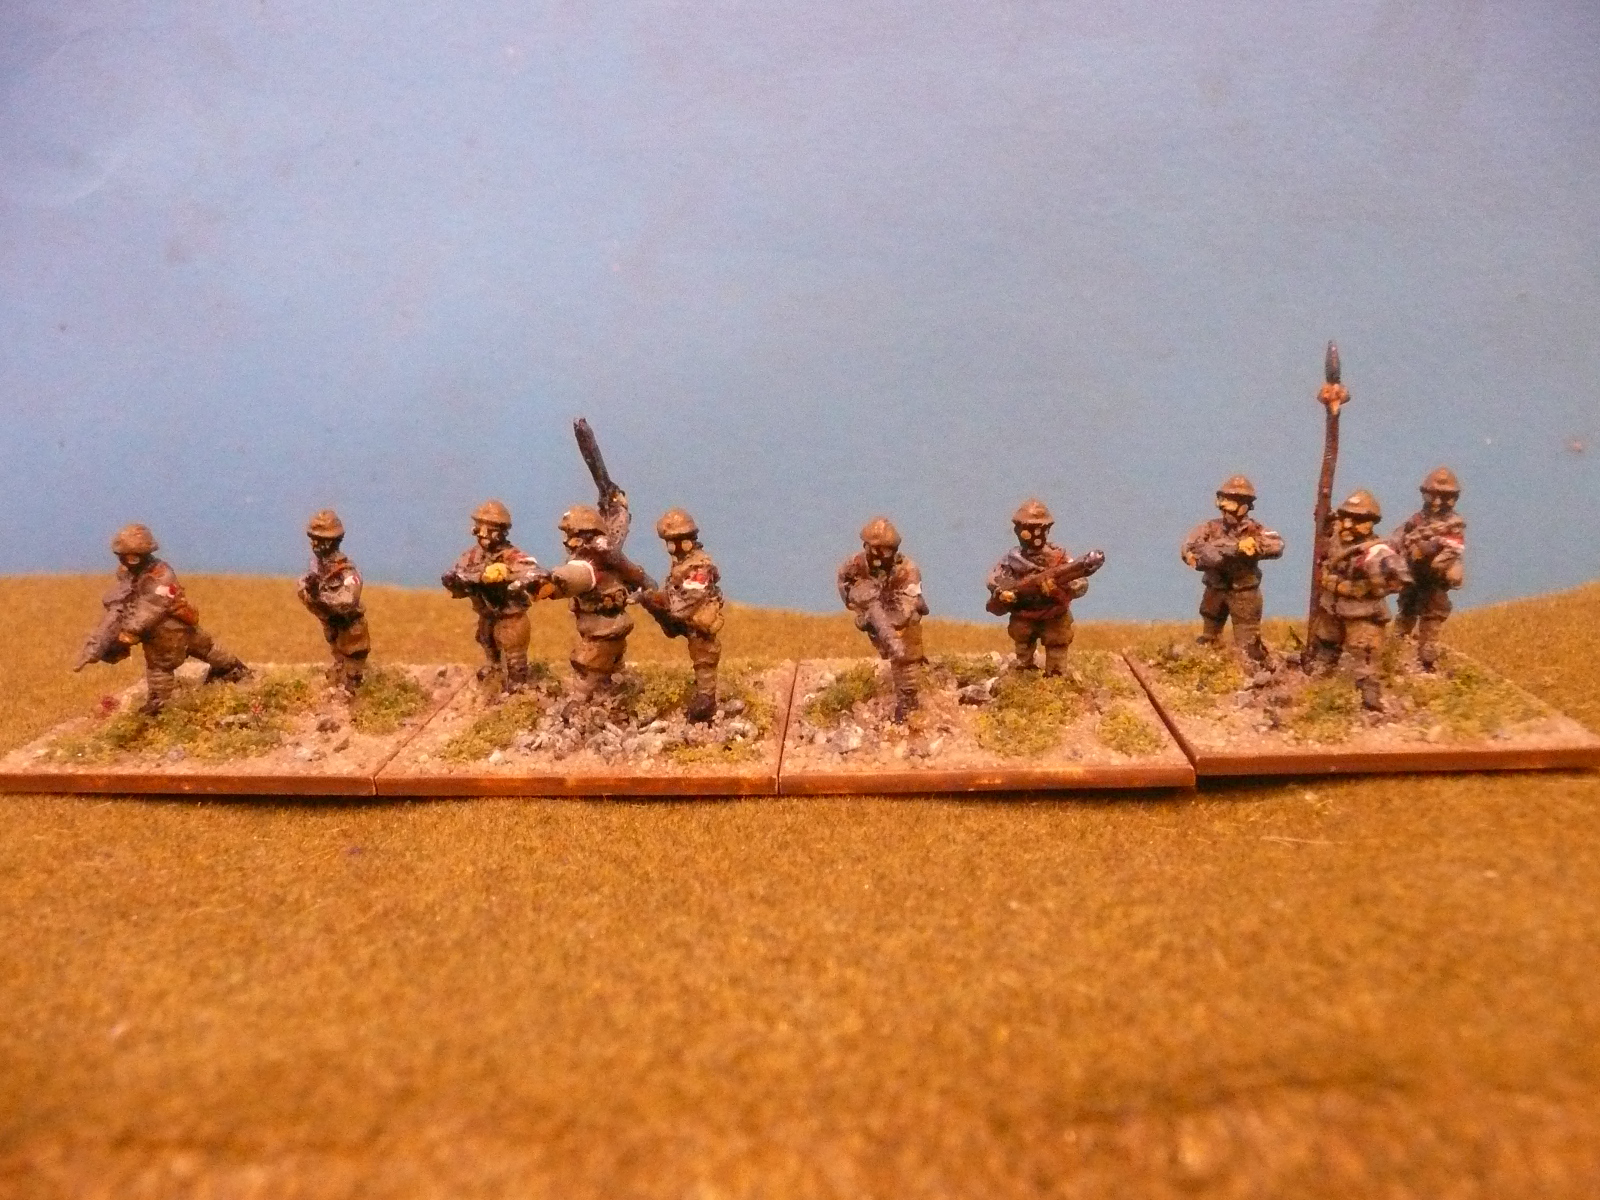
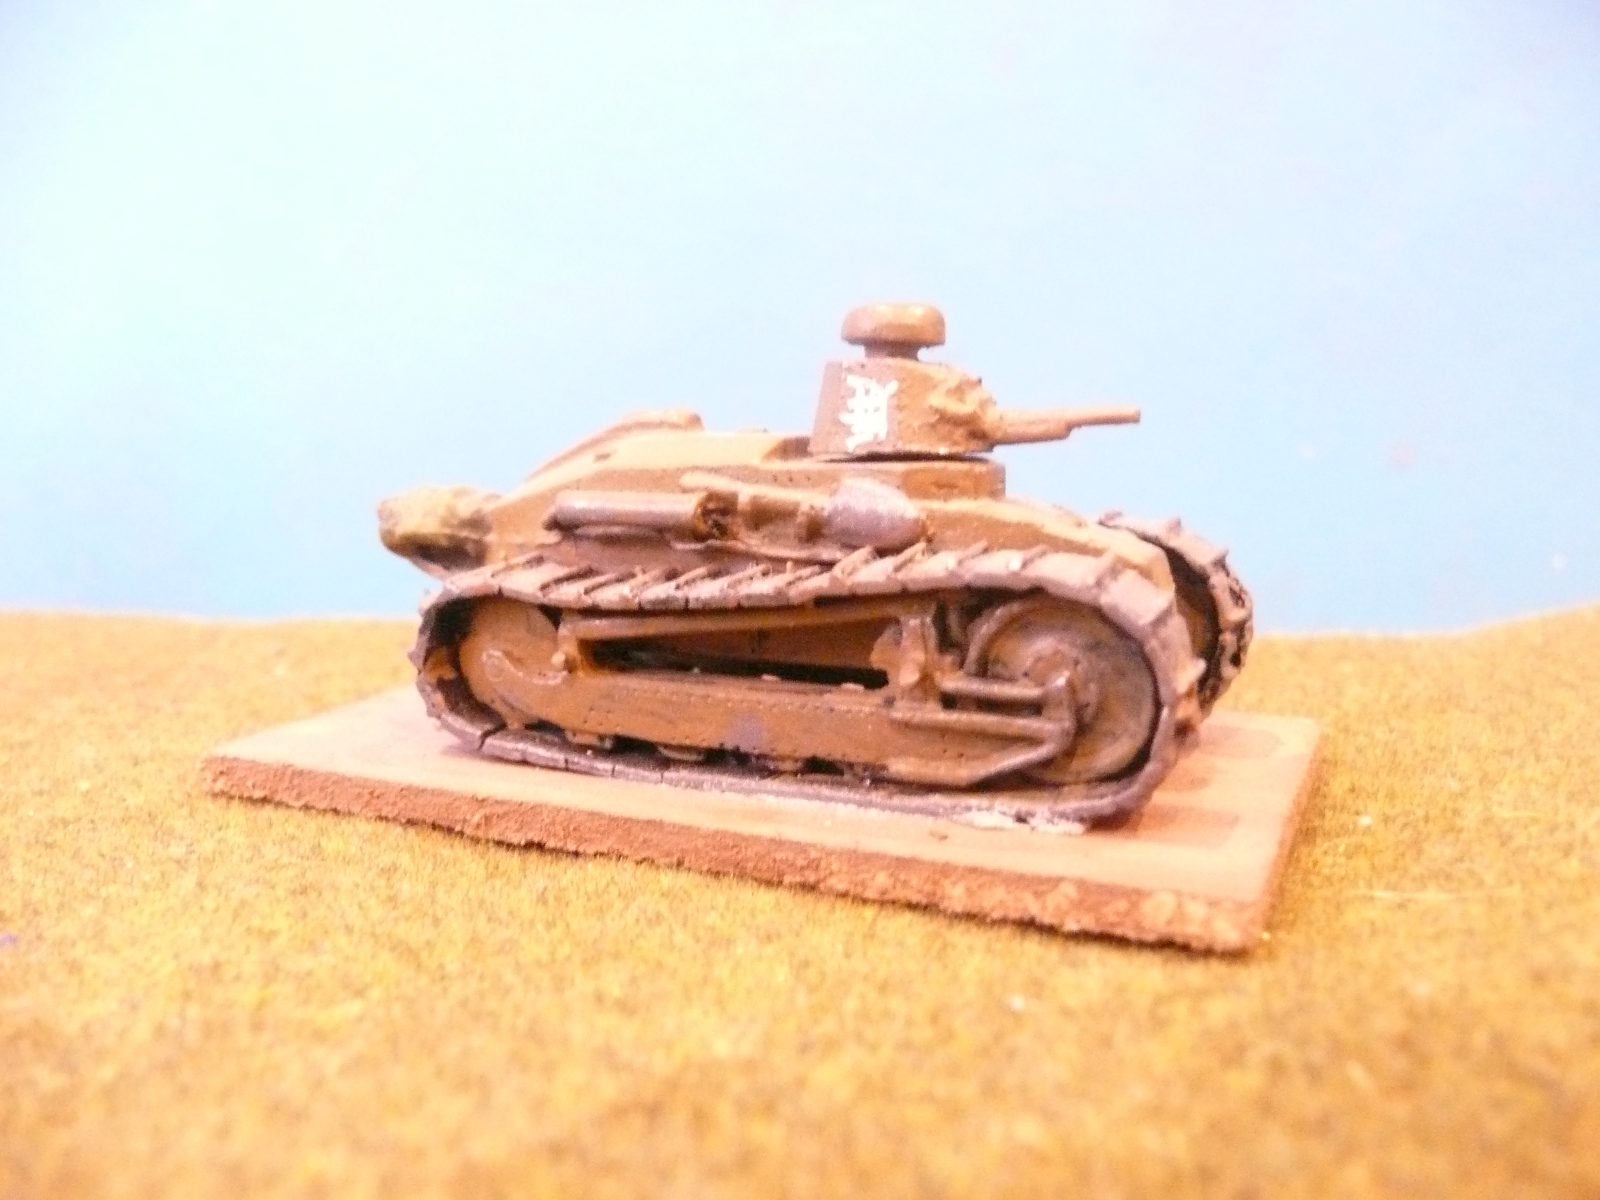
The figures are all from Pendraken's 10mm Russo-Japanese War range with the exception of the Japanese cavalry who are proxies from the South American Wars range


Friday 9 November 2018

QRF 15mm Chinese Civil War range

Many years ago QRF produced a range of 15mm Chinese Civil War figures for the 1920-30's period sculpted by Steve Cooper. It is out of production  and will probably never see the light of day again.
Back in the 1990s I had a web page featuring the range but that disappeared along with Freeserve . I was recently contacted about the site so I decided to blog it for posterity.
A useful reference is the Osprey Men-At-Arms Chinese Civil War Armies 1911-1949 (Number 306).
Kuominchun Dare-to-Die Assault company

The range covered a selection of Warlord Cliques. For no particular reason the armies are Fengtien (red/white arm band) and Kuominchun Clique (black with white circle armband)

The Fengtien Clique was based in Manchuria so I used mainly Northern Troops with some Southern Troops as a variation. The force also has allied Chihli Clique troops
Fengtien Infantry company
Fengtien Dare-To-Die Assault Company
Fengtien HMG Company
Fengtien Mortar Company

The crews are from Peter Pig's WW1 range and include my first attempts at head-swaps
The mortars are from Peter Pig's AK47 range

Fengtien Infantry company 
Chihli Dare-To-Die Assault Company

The Kuominchun Clique was based in Western China and for which I used Southern and Neat Troops.
Kuominchun Infantry Company

Kuominchun Dare-to-Die Assault Company
Kuominchun HMG company
Generals

The 2 bases on the left are from Peter Pig's WW1 and SCW ranges

The 2 bases on the right are from CF1 ,Chang-Tso-Lin, Frank One-Arm Sutton and assorted important bods, & CF2, 'Dogmeat' General and Concubine.

Of course no self-respecting Warlord would dream of going into battle without the latest in 20th Century technology
Peter Pig's WW1 Staff Car 
Miniature Figurines' WW1 Lorry 
Miniature Figurines' Model T ford
QRF Armoured Truck 
Mini-Figs Rolls Royce Armoured Car 
Mini-Figs Daimler 5.7cm Flak, Panzerkraftwagen (modified) 
FT17 - not sure of manufacturer

The QRF range was comprised of the following

CG1Northern Soldiers (Fengtien)
CG2Southern Soldiers (Any)
CG3Northern Assault Troops (Fengtien)
CG4Boy Soldiers (Any)
CG5Northern Cavalry (Fengtien)
CG6Southern Cavalry (Any)
CG7'Neat' Soldiers (Chihli, Kuominchun)
CG8Dismounted Northern Cavalry (Fengtien)
CK1Feng Yu-Xiang and Kuominchun Generals
CK2Kuominchun Assault Troops
CK3Kuominchun Line Soldiers
CK4DWM 1909 MG with Crew x 3
CC1Wu Pei-Fu and Chihli Generals
CC2Chihli 'Tin Hat' Assault Troops
CC3Chihli 'Tin Hat' Line Soldiers
CC4Chihli Assault Troops
CC5Chihli DMW 1909 MG and Crew x 3
CF1Chang-Tso-Lin, Frank One-Arm Sutton and assorted important bods
CF2'Dogmeat' General and Concubine, Executioner and victims, 3 x Guards
CF3Mukden Lancers
CF4Browning LMG and Crew x 3
CF5Maxim MG and Crew x 3

There were some really nice touches in this range such as infantry with goggles and boy soldiers but the range does show it's age now.

Unsurprisingly I still have a pile of lead waiting to be painted

I do play with them occasionally using AK47 version 1 rules

The troops in peaked hats would do very nicely for the Mexican Revolution

Finally this army is my claim to war-gaming fame as it appeared on the cover of Miniature Wargames #262


My thanks to Barnaby for making me do this.